With artificial intelligence taking deep roots around our lives and making it easier for us to do a lot of things, more and more software developers, IT companies and start-ups are looking for ways to integrate state-of-the-art AI technology into their products to get the jump over their competitors.
Many modern CRM platforms, email clients, personal assistants, video editors, project management programs and other kinds of software tools now come equipped with AI assistants allowing their users to work faster and be more productive.
Office software is not an exception. The idea of integrating artificial intelligence into electronic document workflows has been winning the minds of office software developers over the last few years and now there are several interesting integration examples that significantly change the way people work with office files.
In this article, we will take a look at the most successful examples of symbiosis between artificial intelligence and office software, and examine the process of integrating an AI assistant into an office package through the example of ONLYOFFICE Docs, an open-source office suite.
AI and office software: best integration examples
The market of office software is highly competitive, and it’s an evident fact that the biggest corporations always have an advantage over other players. However, even small companies and independent developers can come up with elegant solutions bringing the power of artificial intelligence into the universe of document editing and collaboration.
Here is a quick overview of some of the most popular office packages with integrated AI assistants available on the market:
- Microsoft 365. The Redmond giant presented its own AI tool known as Copilot in March 2023. It combines the power of large language models (LLMs) and makes it easier for users to work with the Microsoft 365 apps, including Teams, Outlook and Edge. Copilot is deeply integrated into the Microsoft ecosystem and allows you to write and edit text content in Word, analyze trends and create comprehensive data visualizations in Excel, and create impressive presentations based on your prompts in PowerPoint. Copilot for Microsoft 365 is available with a paid subscription.
- WPS Office. Microsoft Office’s competitor from China, WPS Office, has an AI assistant called WPS AI. It’s a generative AI tool that allows users to generate text content, summarize large documents, analyze data, extract outlines from PDFs and create meeting drafts. WPS AI can be used in text documents and PDF files and offers a free trial with a limited set of features. To access its full functionality, you need to purchase one of the paid versions.
- Google Workspace. The Google corporation has an AI-powered assistant for its productivity apps called Gemini. This tool is built into Docs, Sheets and Slides allowing you to write various kinds of content and generate images in text documents, create tables and formulas in spreadsheets, and generate new slides with images and content in presentations. Gemini for Google Workspace is available as a paid add-on. Interestingly, the Google Workspace Marketplace also offers different AI assistants developed by third-party developers for Docs, Sheets and Slides but you should try them at your own risk.
- Zoho WorkDrive. This online content collaboration platform and storage has an IA integration feature called Zia. It’s an AI-based writing assistant available in some Zoho products, including Zoho Writer. Using Zia, you can check your content for spelling and grammar mistakes and improve its readability. The main objective of this tool is to help you write concisely and clearly. Zia also can generate new content and images. It’s not available for free.
Taking everything into consideration, the following conclusion seems evident: the most popular office suites provide excellent AI integration options but almost all of them are paid.
Now let’s explore the case of ONLYOFFICE Docs, an open-source office package, that provides robust AI capabilities based on ChatGPT and discover how this integration works.
ONLYOFFICE Docs and AI: a brief overview
ONLYOFFICE Docs is an open-source and free office suite for text documents, spreadsheets, presentations, fillable forms and PDF files. The suite has a self-hosted version for local deployment and a cloud-based version for a quick start. There is also a desktop client for Linux, Windows and macOS and mobile apps for Android and iOS. The source code of the ONLYOFFICE suite is available on GitHub.
ONLYOFFICE Docs has an open API, which makes it possible to integrate the editors with third-party services. Such integrations work via plugins, special add-ons that bring new capabilities and features. Among dozens of ready-to-use plugins for the ONLYOFFICE suite, you can find those that enable the power of artificial intelligence. More precisely, these are the plugins for ChatGPT and Zhipu Copilot.
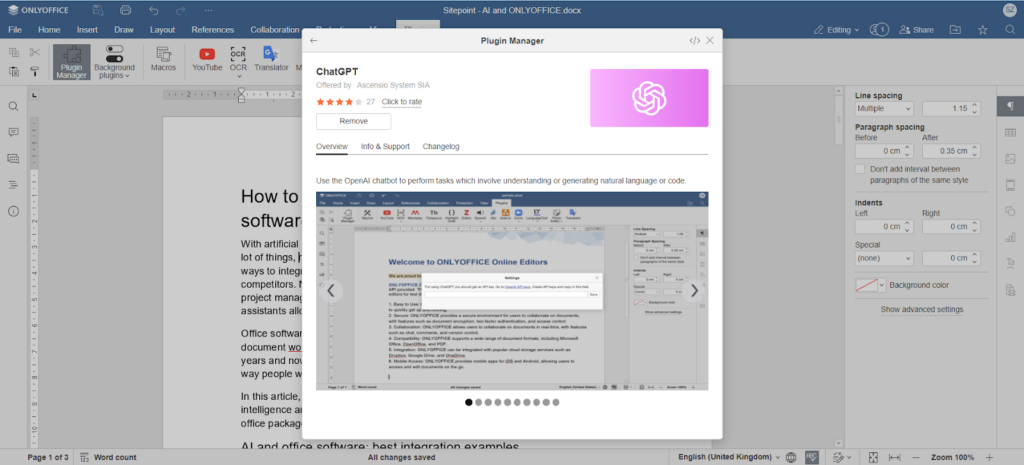
Both ChatGPT and Zhipu Copilot are accessible in the ONLYOFFICE editor’s interface via separate plugins that can be installed and deleted with a few clicks via the Plugin Manager. These plugins are officially developed and maintained by the ONLYOFFICE team. As all other plugins, they are available for free.
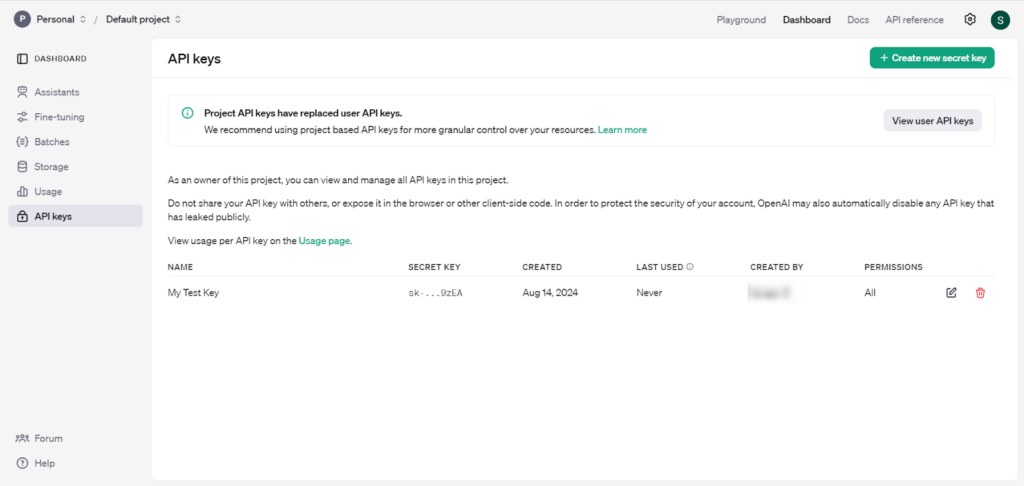
To make these plugins work, you need to specify an API key provided by the corresponding platform. When it comes to ChatGPT, you can find a valid API key in the settings of your OpenAI account.
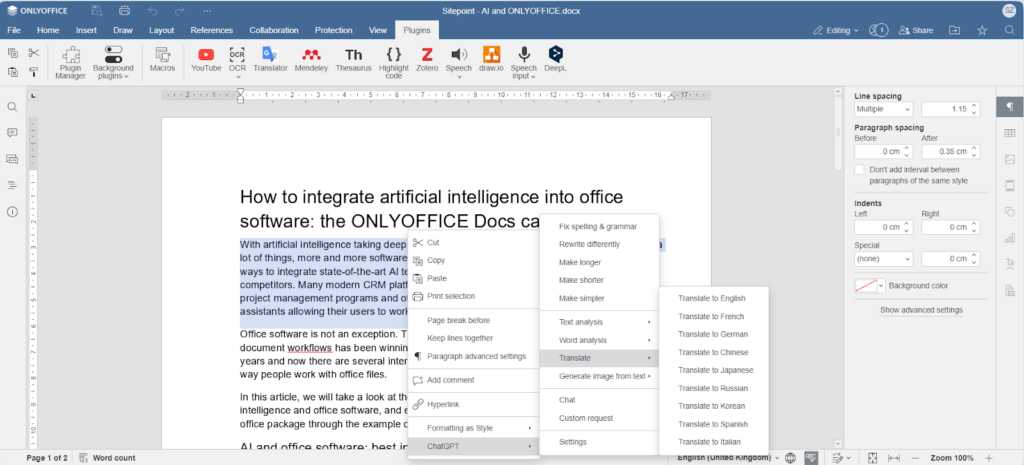
When you enter a valid API key in the ChatGPT plugin and enable it via the Plugins tab, you will have access to the following features via the context menu, which makes it easier to work with texts*:
- Generation of text content based on your prompts;
- Creation of images in different resolutions;
- Translation to several languages, including English, Spanish, Italian, Chinese, German, French, etc.;
- Word analysis;
- Extraction of keywords;
- Text summarization;
- Text manipulation;
- Correction of spelling and grammar mistakes;
- Communication with the chatbot.
The Zhipu Copilot plugin provides similar writing assistance features in ONLYOFFICE Docs and is designed for Chinese-speaking users because it’s based on a localized knowledge base.
In ONLYOFFICE Docs, you can interact with the ChatGPT service not only in text documents but also in spreadsheets and presentations, so you can perform various tasks such as data analysis and finding information for your slides.
Now that you know what ChatGPT and Zhipu copilot can do for you when you work on office files, let’s take a deeper look at the ChatGPT plugin to see how it works and what key elements its source code includes.
Note: the ONLYOFFICE developers assume no responsibility for the accuracy or reliability of the information provided by ChatGPT and ZhiPu Copilot.
Structure of the ChatGPT plugin
The ChatGPT plugin consists of five directories, with the HTML files stored separately in the root directory. Here is a quick overview of each file with code samples:
1. index.html: Since the plugin operates as a background plugin, it doesn’t require a user interface. The index.html file references all the scripts, code files, and stylesheets, ensuring they are utilized when the plugin is activated.
<head>

<meta charset="UTF-8" />

<title>OpenAI</title>

<script type="text/javascript" src="https://onlyoffice.github.io/sdkjs-plugins/v1/plugins.js"></script>

<script type="text/javascript" src="https://onlyoffice.github.io/sdkjs-plugins/v1/plugins-ui.js"></script>

<link rel="stylesheet" href="https://onlyoffice.github.io/sdkjs-plugins/v1/plugins.css">

<script type="text/javascript" src="scripts/desktop.js"></script>

<script type="text/javascript">

if (!/MSIE \d|Trident.*rv:/.test(navigator.userAgent)) {

document.write("<script type='text\/javascript' src='vendor\/GPT-3-Encoder\/encoder.js'><\/script>");

document.write("<script type='text\/javascript' src='scripts\/code.js'><\/script>");

} else {

document.write("<script type='text\/javascript' src='scripts\/code_ie.js'><\/script>");

}

</script>

</head>
Code inside the <head> tag of index.html file
2. chat.html: This file defines the HTML structure for the chatbox that appears when you select the chat option in the ChatGPT plugin.
3. Other HTML files: The root directory contains additional HTML files for various error messages and logs. These files are designed to handle conditions such as insufficient tokens or invalid requests, to make sure the plugin responds appropriately to different scenarios.
Overview of the resources directory
The resources directory primarily comprises two components: CSS styles and images for different modes.
1. CSS Sub-directory: This contains styles.css and custom.css. Both stylesheets apply CSS to various components throughout the plugin.
2. Image Directories: The second component includes the following:
- light contains images optimized for light-themed editors;
- dark contains images optimized for dark-themed editors;
- icons includes icons in various aspect ratios and sizes for different display settings and themes.
These above-mentioned resources ensure that the ChatGPT plugin functions well across different editor themes and resolutions.
Overview of the scripts directory
The code.js file contains the core logic for the plugin that integrates various functionalities powered by the OpenAI API. Let’s go through this file in more detail:
1. Initialization and Setup:
- The plugin initializes variables, including an API key, model settings, and UI elements.
- The checkApiKey method retrieves the OpenAI API key from local storage.
function checkApiKey() {

ApiKey = localStorage.getItem('OpenAIApiKey') || '';

if (!ApiKey.length) {

bHasKey = false;

} else {

bHasKey = true;

}

};
A code snippet from checkApiKey() method
2. Context Menu Generation:
- The getContextMenuItems() method dynamically generates context menu items based on the type of selection in the document (e.g., text selection, images, shapes, hyperlinks, etc.).
- If the API key is present, additional options like spelling and grammar correction, text rewriting, translation, and image generation are added to the context menu of the plugin.
- This method also includes a logic to check for the presence of images in the document and an option for generating image variations.
function getContextMenuItems(options) {

link = null;

checkApiKey();

let settings = {

guid: window.Asc.plugin.guid,

items: [

{

id : 'ChatGPT',

text : generateText('ChatGPT'),

items : []

}

]

};
A code snippet from getContextMenuItems() method
3. Event Handling:
- The plugin attaches event handlers for context menu actions. For example, the onContextMenuShow() event triggers the display of the custom context menu and performs additional checks, such as retrieving the current word.
- The onSettings() event handler opens a settings modal dialogue when the settings menu item is clicked, and more.
4. Utility Methods:
- Helper methods like generateText() for text translation, showError() for error display, and isEmpyText() for text validation are included in the code.js file as well.
- The createSettings() method creates a UI container displaying token information and a settings button.
function createSettings(text, tokens, type, isNoBlockedAction) {

let url;

let settings = {

model : model,

max_tokens : maxLen - tokens.length

};

if (settings.max_tokens < 100) {

console.error(new Error('This request is too big!'));

return;

}
A code snippet from createSettings() method
The next file is chat.js. It manages the logic for the chatbox, which can be initialized by right-clicking anywhere in the document. It works in combination with the chat.html file to ensure the chatbox’s structure and functionality are implemented correctly.
function createMessage(text, type) {

let chat = document.getElementById('chat');

let message = type ? document.createElement('div') : document.getElementById('loading');

let textMes = document.createElement('span');

textMes.classList.add('form-control', 'span_message');

textMes.innerText = text;

chat.scrollTop = chat.scrollHeight;

if (type) {

message.classList.add('user_message');

chat.appendChild(message);

sendMessage(text);

} else {

message.id = '';

message.innerText = '';

}

message.appendChild(textMes);

};
Code snippet of the createMessage() method from the chat.js file
Now a few words about the settings.js file. It manages the settings section of the plugin. This is where users enter their API keys. This file also validates the API key entered by the user.
function createError(error) {

document.getElementById('err_message').innerText = errMessage;

console.error(error.message || errMessage);

};

function createLoader() {

if (!window.Asc.plugin.theme)

window.Asc.plugin.theme = {type: 'light'};

$('#loader-container').removeClass( "hidden" );

loader && (loader.remove ? loader.remove() : $('#loader-container')[0].removeChild(loader));

loader = showLoader($('#loader-container')[0], loadMessage);

};
Code snippets of createError() and createLoader() methods from the settings.js file
There are also some other .js files in the scripts directory that mainly include JavaScript for error prompts (as mentioned earlier in the HTML section). Additionally, some files contain JavaScript triggers for different environments where the plugin might be used (desktop version, cloud version, etc.).
Translations directory
This directory contains translation files for different languages, each represented by a .json file. Using the onTranslate() method, the plugin checks this directory, identifies the file corresponding to the system’s language and retrieves the necessary translated text.
This mechanism ensures that the plugin can dynamically adapt to various languages, providing a localized and user-friendly experience.
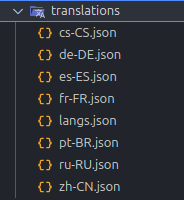
The vendor and the licenses directory
The vendor directory houses the code and resource files for the third-party libraries used in the plugin. This directory ensures that all external dependencies are neatly organized and easily accessible.
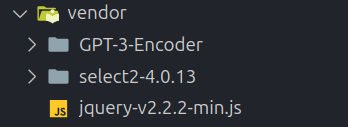
This directory has three components:
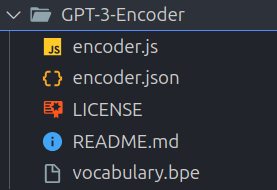
1. OpenAI (Chat GPT BPE Encoder Scripts): these scripts are essential for encoding and decoding the text returned by the GPT engine.
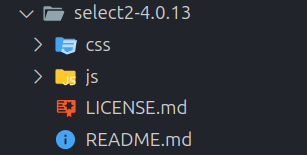
2. Select2 Library Scripts: this is a powerful library that enhances the plugin’s user interface by providing customizable select boxes, making the plugin easier to use.
3. jQuery Base File: jQuery simplifies HTML document traversal and manipulation, event handling, and animation, making the UI more dynamic and responsive.
This was a detailed overview of the ChatGPT plugin created by the ONLYOFFICE developers for their office suite. If you want to explore the plugin’s code in detail and the methods it uses, you can take a loot at this GitHub page.
Using the same principles and the ONLYOFFICE API, you can build a plugin for any other AI-based writing assistant and use its capabilities within the interface of an office suite.
 SitePoint Sponsors